Tuesday, February 23, 2010
Big Bang Hearts
Posted by women hairstyle at 5:00 AM 0 comments
Labels: Bi-color, easy, fancy, french manicure, glitter, stickers
Tuesday, February 2, 2010
Grungy White Widow
I was trying to get in the mood for hearts and flowers this week...but decided I wasn't quite ready for pink or red and white. so I decided to try a couple more Urban Decay polishes - "Grunge", a nearly-black green, and "White Widow", which I really thought was going to be more white instead of sort of champagne colored. I like the color, it just didn't have the same effect with the green that I was envisioning. In any case, I started with two coats of White Widow (which does look white here with a flash):
Happy polishing!
Posted by women hairstyle at 7:58 PM 0 comments
Tuesday, January 26, 2010
Flashy Zoya
Then two coats of Nova on the diagonal (I don't know why, but I'm really drawn to diagonal designs).
As you can see below, I experimented with the design I had in mind on my pinky finger. I often do that because if I need to redo it, it's a very small area to remove/re-polish. I liked it, so I started with white curving back and forth across the colors.
Then I put black over it, going the opposite way. My lines aren't perfect by any means, but I think the "squiggles" give the design movement and a little dimension.
Then I tried the matte top coat over my pinky nail, just to see how it would look. You can see how the matte is definately a little different below - it accentuates all the little bits of glitter, rather than just being super-shiny. It doesn't really affect Luna much, but I liked it over Nova. Just not with this particular design. I'm still a high-gloss lover at heart.
So I went over them all with two coats of Zoya topcoat, and cleaned them up. Aside from a white mistake on my right hand middle finger, I think they turned out pretty well. They're quite eye-catching and flashy.
What's on your tips this week? Anything fun for these wintery days?
Posted by women hairstyle at 8:12 PM 0 comments
Labels: casual, easy, glitter, Migi Nail Pens, multi-color
Tuesday, January 19, 2010
Porcini Matte
Then I added a few pink dots above the smile line, for a little added interest. This is where it gets a little funky. That happens sometimes at 1am. I had my Essie "Matte About You" topcoat sitting there, and decided to see what the design would look like in matte.
Interesting, no? It looks like porcelain to me, almost velvety, and merges the dots and background colors into what looks like a solid pattern. I was rather intrigued, and decided to leave it that way for the time being.
Here's what it looks like today, all cleaned up. You'll notice I've got some tip-pull already...I think that's my base coat. I need to get a fresh bottle. I'm not sure I like how Porcini looks in matte form next to my skin, but I do like how these turned out, over all. I haven't played with this matte topcoat nearly enough, methinks. I may go back over them with glossy topcoat later in the week, just for something different.
Next week, I have some of thoes Zoya ultra-sparkly glitters to try, and I think I'll see what this matte topcoat does to them. Might as well experiment before the matte trend disappears, right? Or do you think it will stick around for awhile? Do you wear matte polishes?
Tuesday, December 15, 2009
All Wrapped Up
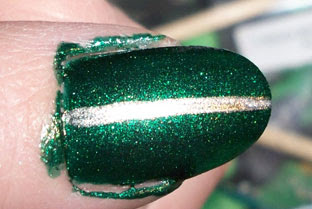
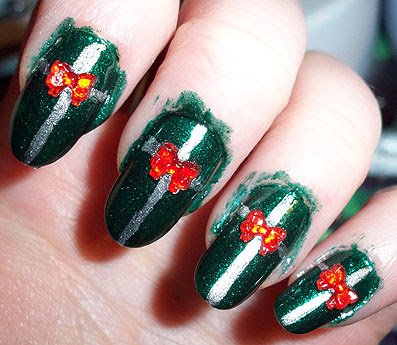
This week, I needed something quick due to switching my manicure days around. So I decided to "wrap up" my nails in festive China Glaze "Emerald Sparkle", with some little red bows I found in my nail art stuff. This is a super-quick manicure, if you're looking for something speedy.
First step - two coats of Emerald Sparkle over one coat of base: Then I used a silver Stripe-rite nail art brush to slip a "ribbon" down the center of each nail. Normally I would offset this to the side a little, but the bows are largish, and my nails are very curved, so they work best in the center to make sure the edges seal down. It's annoying getting stones of any shape caught in clothing, hair, etc.
 Then another silver "ribbon" across the first:
 So there are little ribbon crosses on each nail, like a ribbon on a package.
 Any embellishment will work for the next step - one year I did red nails, white stripes and little clay peppermints at the intersection. I used these cute red bow-shaped stones, one in the center of each intersection, set in top coat.
 Two coats of top coat over the whole thing to seal, and clean 'em up!
 Voila! A neatly wrapped tip for each finger.
What's on your tips this week? Anything festive?
Posted by women hairstyle at 3:39 PM 0 comments
Labels: easy, fancy, fun stuff, holiday, rhinestones


